|
| Small shelf of current WIP bibles |
CONFESSION TIME
I'm a plotter. I didn't start out that way, but as I continued to write, my critique partners/writing buddies told me I must learn to plot. Yeah. Sure. Right. Me plot?
But their reasoning was that once I sold a book or two, I'd need to be able to write a full synopsis. I thought that if I knew what would happen in the story, it would totally ruin the fun of writing. Those CPs were ruthless, and so I learned to plot. Now I can't write without plotting. ☺
I'm visual. I wish I would have known that in high school. It might have saved a lot of hours...days...weeks. But now that I know it, not to mention that the memory of something I thought of two minutes ago can vanish into thin air, I've become aware that if I don't write it down and keep it somewhere, a thought, an idea, a name, a conversation/dialogue between characters can be gone in a the blink of an eye.
I didn't start out building a bible. I didn't even know there was such a thing. Now I know that a lot of writers make them and use them. Do a search on the internet for *how to build a story bible* and see how many articles are available.
The key to a bible is how you put it together. Sue's won't look like Jane's. Ann's won't look like Sue's. It's an individual
"thang" when building a bible. You make and use what you need. Pick and choose what works best for
you.
My method is to use a 3" binder. I started using white, but I've found that using a different color for different genres works well, too. If I'd known I'd be writing a 10-book series, I might have chosen a special color for it. I didn't, so all 11 binders are white. (One for each book and a separate for the series.)
 |
| Outside front of bible |
Like Penny and Melissa, I use pictures to start. One of the hero, one of the heroine, and one each of a child or pet or whatever is needed. I use my B&W printer to print them--no need for color. Those are in a file on my computer. I slip the photo of the main characters into the front of the binder. In the photo on the right, you can't see the photos, but there's a method to my madness. Because I only plot the main idea of each scene, I don't know exactly what is going to happen, so as I'm writing and realize I need to change something in previous scenes that are written, I use sticky notes and put them on the front of the binder. I also keep track (upper right of photo) of how many words and pages I've written, both by scene and chapter, and by date.
 |
| Heroine & Hero |
Inside the binder, I use sheet protectors on the things I use the most. The order in which I place them isn't always the same, but the basics are...until I realize I need to add something new.
Characters are the most important thing in a story, both who they are and what they look like. (Harlequin likes us to send pictures of well-known people for our cover ideas.) There are many places to find pictures for characters. Modeling websites, photo sites (do a web search), even Pinterest are helpful.
 |
| Character List |
Next comes a complete list of character names, starting with the hero and heroine and including the names of any characters that appear in the book or are mentioned by name. After having to hunt for the name of the waitress at the local cafe, who appears randomly throughout the series, or the parents who were mentioned by name, but never appeared, I decided everyone with a name was needed, after all. If a new character appears, the name and who they are (related to hero/heroine or minor character, even if only mentioned), that character goes on the list.
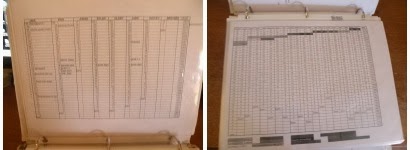
It helps to know the ages of each of the main characters, their children, brothers and sisters, and babies born that are relevant, so I create an age chart for each book (below left). The first year at the top (in the right column of the graph) is the year in which the book takes place, then drops by each year, until the oldest character is born. There's enough room to put a few words for something such as "moved to Desperation" or "Graduated high school," anything that might be a major event in time that appears as backstory in the book. If it's a book within a series, I have a chart with the main characters' ages in all the books. If there are children, those ages are listed, too. (below right)
 |
| Age charts story and Series Main Characters |
Then comes the plotting. While I do the original plotting on a big white board, I like to have a portable copy I can take along or have at hand to look at as I write. I also create a calendar that has the scene on the date it takes place (one page per month). It helps me know how time is progressing throughout the story, and I don't have to hunt for how long it's been since something has happened...or will happen.
 |
Small storyboard and Calendar of Scenes
|
Another handy tool is to have a calendar of a full year. I found a great place online that has a printable calendar that goes back in time and goes forward a few years, too. Another aid in plotting is a timeline, which comes in handy with the full year calendar when working through the story calendar. The timeline includes time of day. It helps when plotting forward to see if all makes sense, before using the monthly calendar.
 |
| Full year calendar and Timeline |
I've always loved looking at house designs and house plans. When many scenes will take place in a particular place, such as a house, I look for a plan that will suit my character. Why? Without a "map," I get lost and forget if the kitchen is to the left or the right, or even where the staircase is located. It's like playing with a dollhouse on paper. ☺ Because the setting of the series is based on the layout of the area around the town where I spent my junior high and high school years, I pulled up Google Maps and have several aerial shots. Three of the books in the series involve two brothers and a sister. A little mini-series within a series. The house of the hero in DESIGNS ON THE COWBOY (June 2013) is modeled after my great-aunt and great-uncle's house, a Victorian built in the late 1800s. I had to go by memory on the inside, but for the farm/ranch, itself, an aerial view helped with the outbuildings, roads, and more. This house and surrounding area play a big part in my upcoming August book (the sister), and a neighbor's house, which really isn't there. I added squares of paper to show where the house, barn, a large pond, and other things were located on the hero's property.
 |
| House plan and photo, with aerial shot of the layout of the land |
Last but not least for the August book, I kept getting myself turned around in the area around the hero's ranch house, so I created my own little map, so I would know what the characters would see and how they would get to where they were going. (on left) The photo on the right is my working calendar. I began it about halfway through the series. It helps me keep on deadline and get things done when they need to be done to beat that deadline. ☺
 |
| Layout of ranch yard and My Working Calendar |
All of the above--and sometimes more--are kept in protective sleeves in the front of the binder, now a story bible. Behind them are tabs for each printed chapter. Again, for portability. I often work while waiting to pick up grandkids from school. Nearly everything for writing the story is in the bible. Some have more information from research I've done, most don't have aerials or ranch "maps." If I think I might need something, I'll add it. Pockets in front and back of the binder are handy for extras, such as scribbled notes or ideas for later.
For more information on Story Bibles, check out
Taming the Series Beast on my author blog. There are also links there for information on how other writers create their bibles.
So there it is. My method of keeping track. While I'd never dreamed of writing a 10-book series, the first two books grew into more new books, and I'm thankful I'd already begun to keep a bible for each book. To keep all the major series information and a complete list of all characters (even those mentioned) and a complete age chart, who they are and what books they appear in, I use a 1/2" binder.
Remember, if you decide to create a story bible, do it your way. Mine is only one of many.
Are you completely confused? Overwhelmed? That's okay. It's done little by little. For more details, you can give me a shout in the comments. There are always little tricks to make it easier.
Oh, and HAPPY THANKSGIVING!!! (We're having our turkey day tomorrow.)